VPC peering
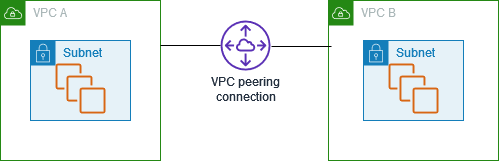
VPC peering is a networking connection between two VPCs (Virtual Private Clouds) in the same or different AWS accounts.
It allows traffic to flow between the VPCs using private IP addresses, as if they were part of the same network. This enables resources in different VPCs to communicate with each other securely and efficiently, without the need for public IP addresses or gateways.
How to set up a Peering connection
Peering connection (step 1)
To set up a VPC peering connection between two VPCs, you need to follow these steps:
- Open the Amazon VPC console.
- In the navigation pane, choose Peering Connections, then click Create peering connection.
- In the Peering connection settings, under Name, type an appropriate peering connection name.
- Under VPC ID (Requester), choose the requester VPC.
- For Select another VPC to peer with, choose the target VPC.
- Choose Create Peering Connection.
- The owner of the accepter VPC must accept the request. To do this, go to the VPC service for your Target VPC.
- Select Peering Connections from the left navigation.
- Select Accept Request under the Actions in the main panel.
- Confirm the request by clicking Yes, Accept from the confirmation modal that appears.
Update the route tables (step 2)
- Open the Amazon VPC console.
- In the navigation pane, choose Route Tables.
- Select the check box next to the route table that’s associated with the subnet in which your instance resides.
- Choose Actions, Edit routes.
- Choose Add route.
- For Destination, enter the IPv4 address range to which the network traffic in the VPC peering connection must be directed.
- For Target, choose the ID of the VPC peering connection.
- Choose Save routes.